How to Remove Part of Kitchen Cabinet
A Step-By-Step Guide to Removing Your Upper Kitchen Cabinets
4
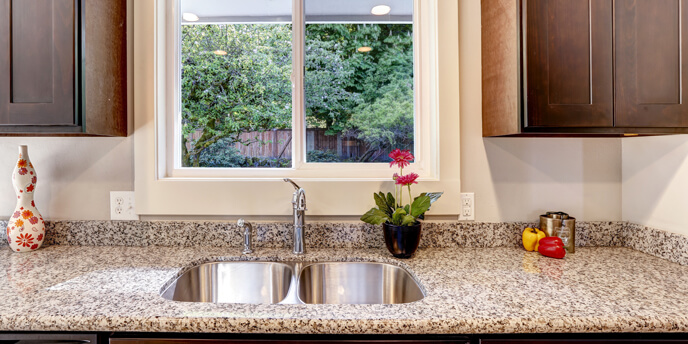
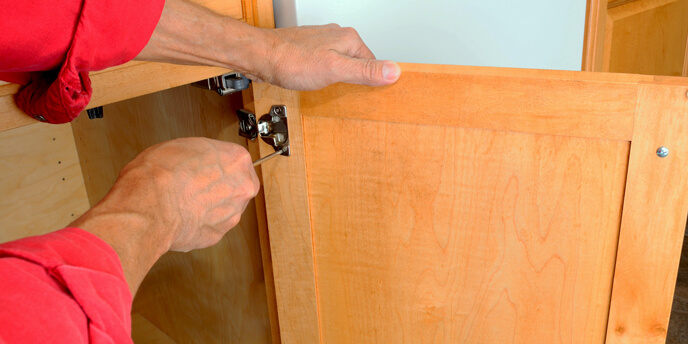
Removing your kitchen cabinets can either be the first step in a whole kitchen renovation or simply a way to give your kitchen a new look. It gives you a chance to restyle your kitchen or even dabble with modern open shelving. Whichever direction you go in, this step-by-step guide will show you how to remove your kitchen cabinets, both with and without damaging them. If you want to remove your kitchen cabinets, you need to figure out what type of cabinets you have, especially if you are planning to reuse them for any purpose. -ricated To identify which type of cabinets you have, open your cabinet and look at the back. If it is the same type of material as the sides of the cabinets, you have prefabricated cabinets that you should be able to reuse if you remove carefully. If the back of the cabinet is your wall, they are not ideal for repurposing. Once you know what type of cabinets you have, follow these steps for removal. The tools and materials you'll need to safely remove your upper kitchen cabinets include: Also, if you're disposing of your cabinets or planning a larger kitchen renovation, you should consider renting a 10 yard dumpster to get rid of your debris without having to wait for your city's bulk waste collection day. Before you begin removing cabinets, follow these steps to prepare your kitchen: If you plan to remove all kitchen cabinets and countertops as well, you will need to take additional steps to prep your kitchen, such as taking out your appliances. However, you can use these steps below to start removing your upper kitchen cabinets. Before you remove your kitchen cabinets: If you are removing your kitchen cabinets to reuse, take these additional steps: Once your cabinets are emptied and prepped you are ready for removal. Exterior elements include: If you're trying to remove the cabinets without damage and want to save the molding as well, use at least one putty knife along with the pry bar. Find a nail and slide a putty knife between the trim and cabinet close to the nail and then pull out slightly, then insert the pry bar on top of the putty knife and continue to pull the trim. If it seems like the trim is about to crack, insert a second putty knife between the pry bar and the trim. Move to the next nail and repeat. Continue until it is loose enough to remove in one piece. If you have older cabinets that were built as one unit, you can skip this step. If removing prefabricated cabinets, they are probably connected to each other through screws in the sides. Using a drill, remove all the screws to disconnect the group of cabinets from each other. This should loosen them, but they will still be attached to the wall and will not need to be supported. To Remove Kitchen Cabinets That Are Attached With Screws: If your cabinets are unitized or were installed with nails and glue instead of screws, you'll need to use the hammer and pry bar to separate the cabinets from the wall. To Remove Glued Kitchen Cabinets: Now that you have removed your kitchen cabinets, you can move on to the rest of your project whether that's painting your old cabinets or installing new ones. Completing a whole kitchen renovation? Check out our Beginner's Guide to Remodeling a Kitchen on a Budget or share your experience with us in the comments.What to Know About Your Kitchen Cabinets Before Removal
Type of Cabinet Description How are they attached? Good to reuse? Unitized Unitized cabinets are built in place using the wall as the back, a style commonly found in homes more than 25 years old. Either nails or glue. Not usually. Prefab Newer cabinets complete with their own back. Usually, individual units are screwed together to create a whole cabinet set, but can be separated and used individually. Usually screwed into the wall via screws through the back of the unit or around the edges. Yes. How to Remove Upper Kitchen Cabinets
Step 1: Gather Supplies
Step 2: Prep Your Kitchen
Step 3: Prepare Your Kitchen Cabinets for Removal
Step 4: Remove Exterior Elements
Step 5: Separate Cabinets From Each Other
Step 6: Remove Cabinets From Wall
Step 7: Congratulate Yourself!
How to Remove Part of Kitchen Cabinet
Source: https://www.budgetdumpster.com/blog/how-to-remove-kitchen-cabinets/
0 Response to "How to Remove Part of Kitchen Cabinet"
Post a Comment